
How to Build a Homemade Zipline over Water (Pond, Pool, Lake, or River)

Deciding to build a zip line over a body of water is both exciting and daunting at the same time. It is not like most backyard zip line setups where the rider will always have solid ground beneath them. Having water beneath the rider is exhilarating, but we want to make sure it is done in a safe manner. At first glance, zip lining across water might seem super dangerous. But in reality, there are many cases where zip lining over water is safer than over solid ground. Let's talk about every factor one needs to consider before embarking on this new adventure!
The Beginning Anchor
Starting from the very beginning you'll need to know what you will be wrapping the zip line around. If you have experience setting up a zip line, this isn't too different. You'll need a thick tree or a big pole to anchor to. You can learn more in this blog article on what makes a good anchor. Typically, the tree needs to have a certain circumference and be in good health. We don't want to have trees being uprooted or snapping in half! 
We also have a zip line calculator that will help you calculate the starting/ending anchor height to ensure sufficient and safe speed across the water.
One thing to note here is you should be thinking about how to strap in your riders at the starting anchor, which is typically higher in elevation than where you end up. Are you going to be using a ladder, or a platform? What kind of logistics are needed for this to happen and be safe.
The Ride
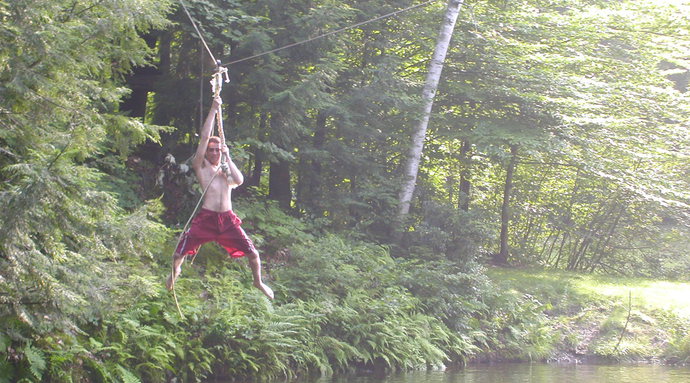
After the starting anchor you'll need to know how much zip line cable you need, which we can get to later in the blog. The ride is the most vital part that needs to be planned ahead. For one, how do you want riders to experience this zip line? Do you want them to be able to ride all the way across and stop at the other end? Or do you expect them to jump into the water halfway through? Depending on your answer you'll either need a harness, swing or just handlebars.

There are a couple of rule of thumbs when it comes to which accessory to use with the zip line. I lean towards a swing set and harness if the ride is supposed to go all the way across. I would use handlebars only if the idea is to jump into the water. If you go the only handlebars method, be sure your riders are strong enough to hold onto it to clear any obstacles in the beginning or the end. For example, from the starting tree there might be some ground before it goes into the water, or the water might be shallow. You don't want to have any riders fall onto the ground or the shallow water.
If the riders are expected to go across the entire body of water, ensure that the water conditions are safe. Under no circumstances should you be installing a homemade zip line over a fast moving river or otherwise dangerous conditions. Ensure there are no rocks or other objects underneath the rider.
Now, for those who are looking for the riders to jump into the water at some point of the ride, you need to ensure they don't keep on going past that point into the ending anchor. Some customers they think they don't need a braking system! You never know when a rider might get tangled, or freeze up, so you want to be extra safe.
Typically we use a bungee braking system, using the tension of the bungee to gently slow the rider down. But setting up a bungee braking system in the middle of the water is near impossible. If your ending anchor ends up farther inland (away from the water), you can install a braking system on solid ground before the ride ends.
Otherwise, we suggest putting a stop block on the line where riders shouldn't cross. A stop block is a block that you screw onto the zip line cable and is immovable. It isn't a braking system, but more of a last resort when it comes to stopping. You can also add on a spring stop to lessen the impact. You can also have some more slack in the line when installing your zip line. Gravity will play its part and slow down the rider.
Logistics
Whether the zip line is across a pond, lake, or pool, you will want to have a way of transporting the zip line cable. Chances are you already a boat, great!

Decide ahead of time if this is going to be a permanent set up or a temporary one. If this is a river, you might not want to set it up permanently as who knows what can come down the river and be obstructed by the cable. A zip line setup is as easy to disassemble as it is to assemble.
Note that for permanent setups, some trolleys are easier to remove than others because some trolleys have to be fed through the cable, where other trolleys can be attached to any zip line.
One last thing is a return system. We don't supply them so you might have to get creative in creating a system where you can easily reel back the trolley. We had one customer have some rope or string in a spool, attached to the trolley. Once the rider was done, the person at the beginning would reel in the string/trolley for the next rider.
Ending Anchor
And finally the ending anchor. Much like the first anchor you'll want to ensure the tree or pole is up to the task. You'll also want to know the distance from the starting to ending anchor. We supply an extra 10 feet of cable to all of our zip line kits to ensure you have some room for the tree.